
Using the Heart Mould
Instrcutions to use Zila 'I Love Cake' Moulds
Using our I Love Cake Mould set is very easy.
It can be used with any regular cake, or used together with our 12-slice or 16-slice round moulds.
Freeze the cream or bake the dough with the mould to make the heart, then put it into your cake.
It’s as simple as that.
The sides of the slices always show the heart, regardless of the position of the cut.
A Few Guidelines to follow
- - Before first use, wash the silicone cake mould and the metal ring with hot water and detergent.
- - The utensil can be washed in a dish washer.
- - Do not use in a microwave oven!
- - It can be frozen to -50°C (-60°F), and baked up to +260°C (500°F).
- - The silicone must not touch an open flame!
- - Before cutting around the cake ring with a knife, remove the silicone baking mould, because it is easily damaged!
- - We recommend Tarant mould release spray for use with our cake moulds, which can also be ordered from our webshop.
- - Apply Tarant mould releasing spray before each use.
- - A lighter layer is sufficient for freezing, but apply the spray generously when baking.
- - Instead of the Tarant mould releasing spray you may use other vegetable fat or oil.
A few easy steps to follow
Note: I Love Cake Moulds are suitable for creating the heart shaped ring in any cake, not only with Zila Cake Moulds.
Detailed instructions
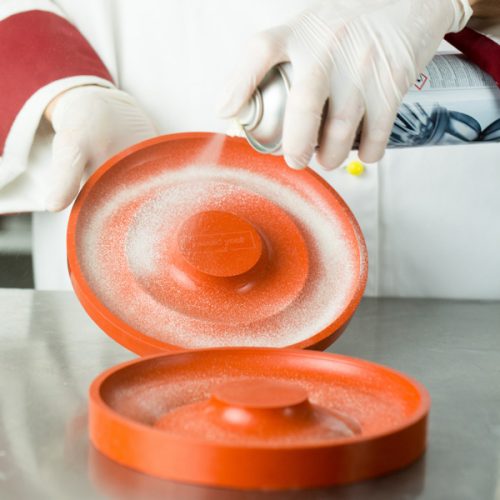
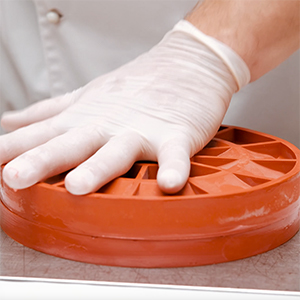
step 1
Spray the moulds
with vegetable oil based
separating agent.
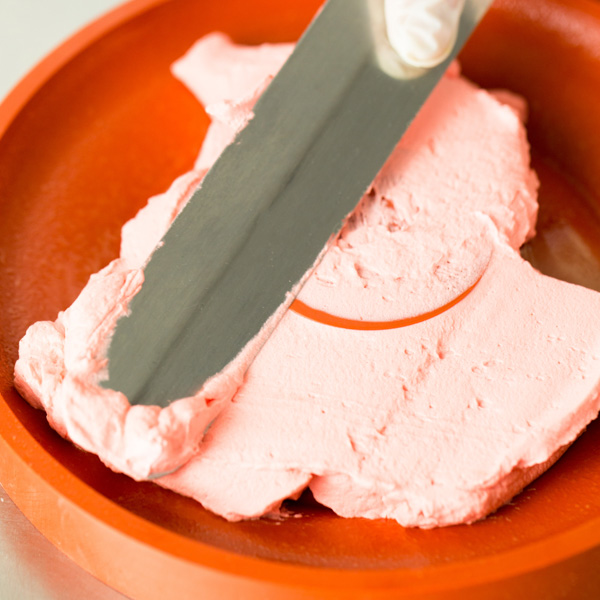
Step 2
Spread the cream
evenly in both
I Love Cake moulds.
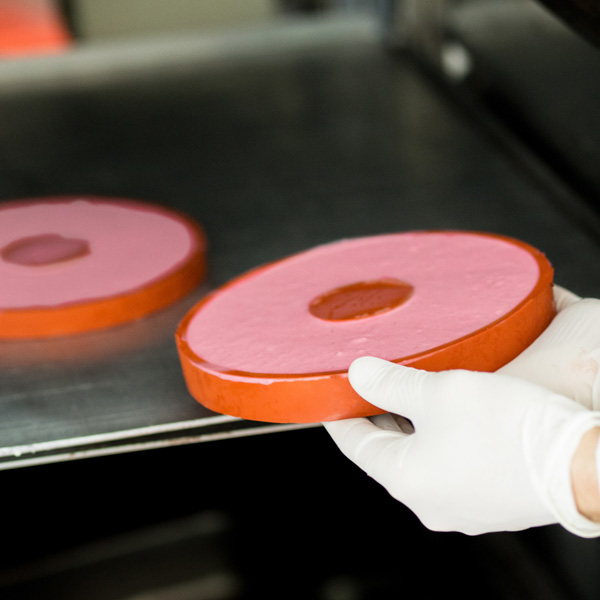
Step 3
Place them into
a freezer or shock freezer
until it’s frozen.
Step 4
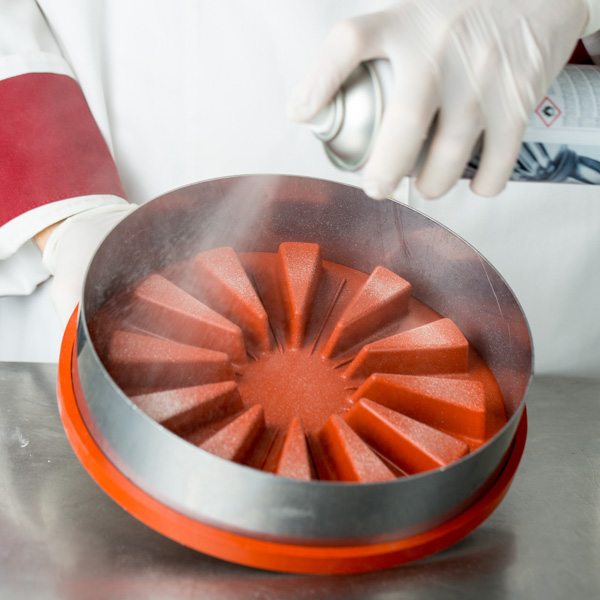
Prepare the
12-slice mould with the
separating agent.
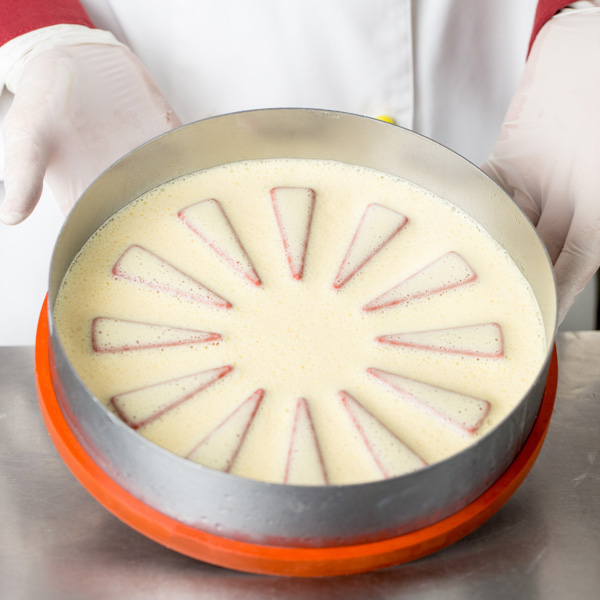
Step 5
Fill the mould with part of the cream .
This will be the top cream layer of the
cake. Set aside the mould.
Step 6
When the Heart
inserts are frozen, heat
both of them gently.
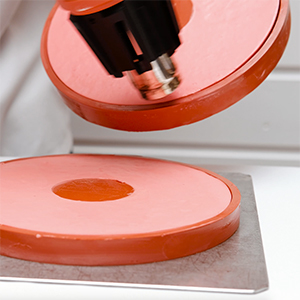
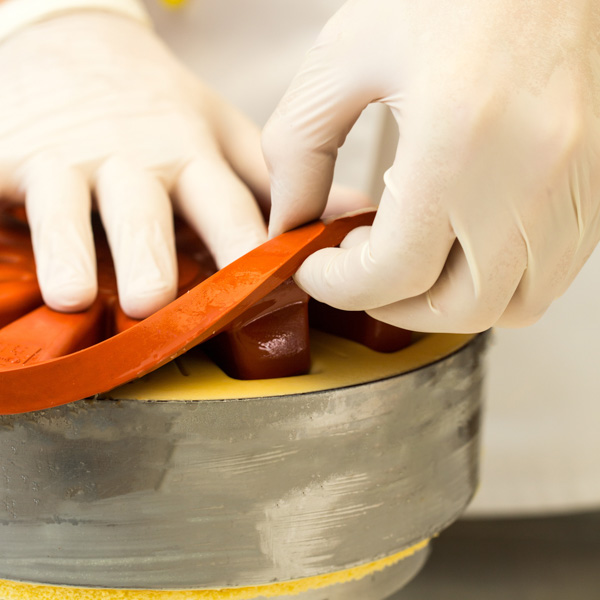
Step 7
Put gently together
the top and bottom part of
the heart shape with the
silicone moulds on them.
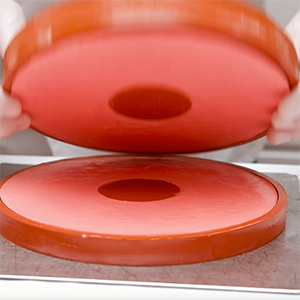
Step 8
Gently push together the parts.
This is important to ensure
no line would be visible between the parts.
Step 9
Remove the top mould and
gently grab out the frozen
heart insert.

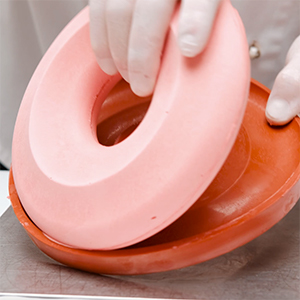
Step 10
Smooth out the edges.
Step 11
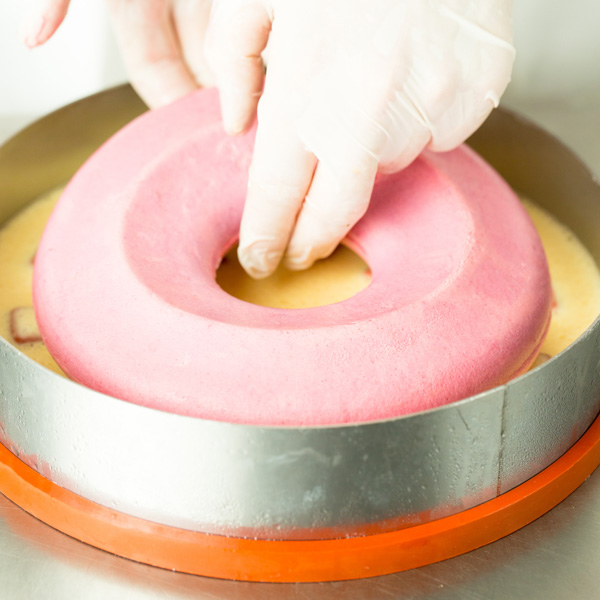
Put the heart
shape upside down into
the cake mould.
Step 12
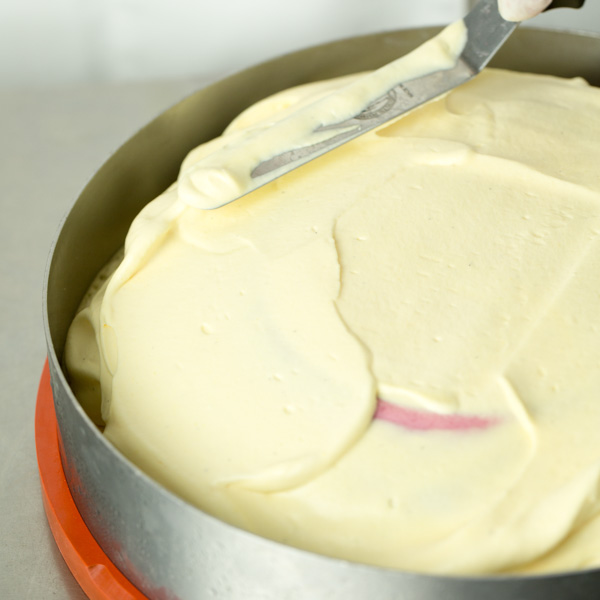
Fill the mould with the rest
of the cream. Take care to
evenly distribute the cream.
Step 13
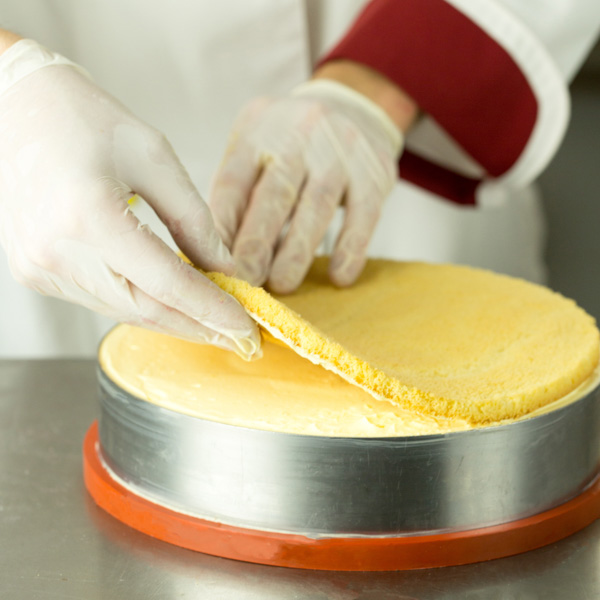
Cover the filled mould
with a thin pre-made
sponge cake.
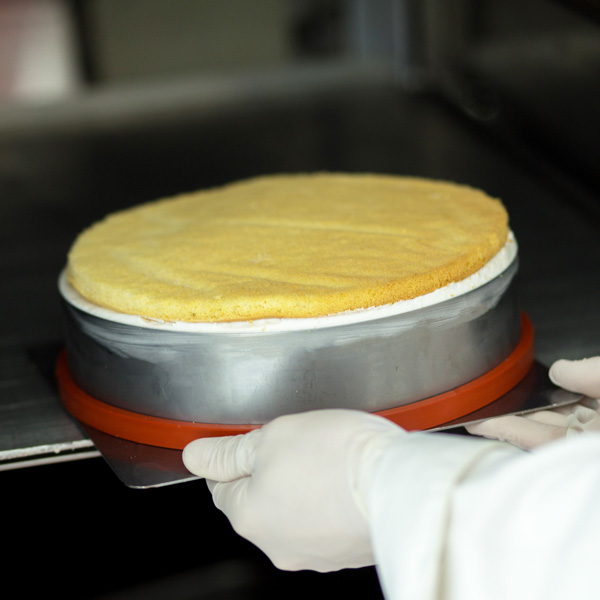
Step 14
Then place it into
a freezer or a shock freezer
for a couple of hours.
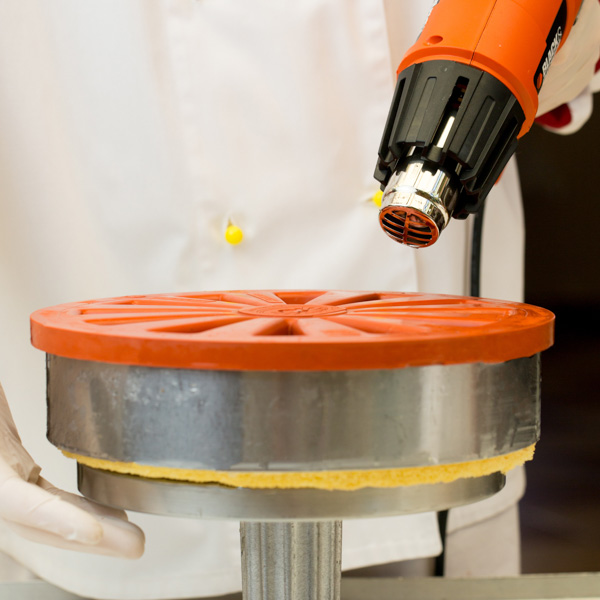
Step 15
When completely frozen,
heat the mould a bit with a
hot air blower.
Step 16
After gently
heated the mould can be
removed easily.
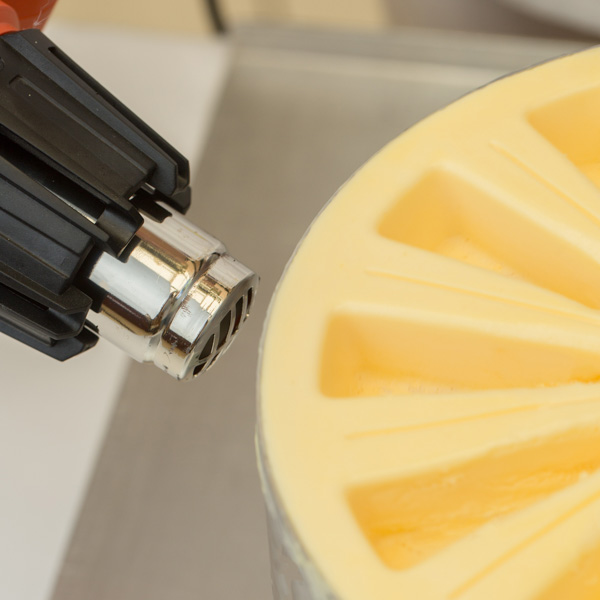
Step 17
Heat
the metal frame
as well.
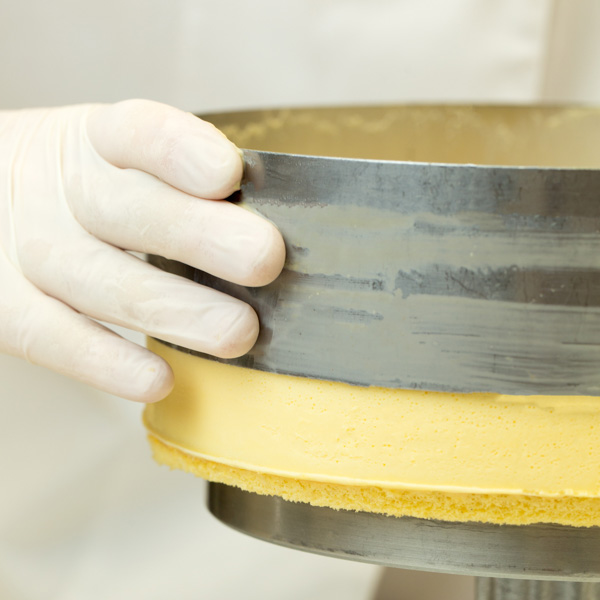
Step 18
After that the
metal frame can be
removed easily.
Step 19
Fill the holes with
liquid sauces and decorate
the cake to taste.
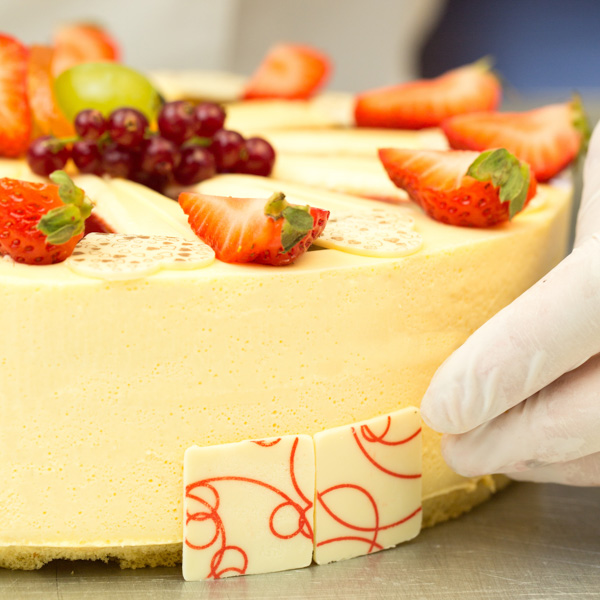
Step 20
Chocolate pastilles can
be used around the bottom
of the cake.
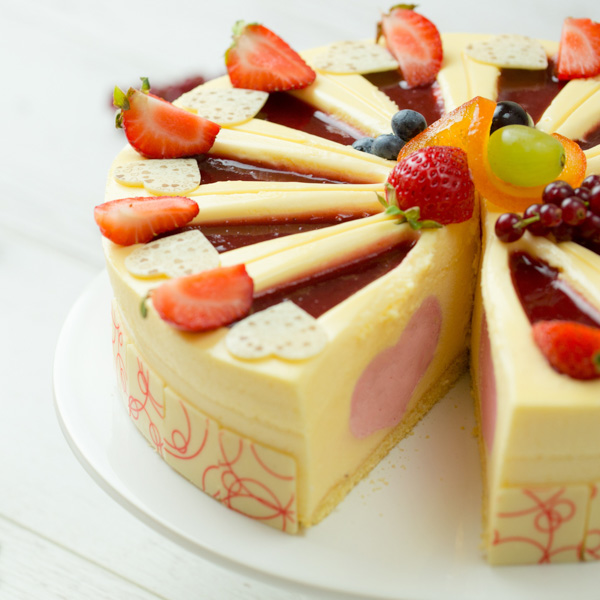
Step 21
The cake is ready and the heart
shape inside can be seen, regardless
of the position of the cut.